Blog title

Welcome to Escape From Reality Blog!
"The world of reality has its limits; the world of imagination is boundless." --Jean-Jacques Rousseau
Showing posts with label Tutorials. Show all posts

Tuesday, September 26, 2023

Tutorial by Pammers

This spooky tag was created by Pammers, from a tutorial she wrote at her blog pammerspassionsai.blogspot.com. She used a template by Clyde form our EFR blog escapefromrealityefr.blogspot.com (the yellow one).
________________________________________________________________

This tag was made by Pammers, using a tut she wrote. You can check it 
out at her blog pammerspassions.blogspot.com. She used one of our masks,
 located escapefromrealityefr.blogspot.com (second mask down).

Thank you, Pammers! 

Friday, May 27, 2022

Grand Opening: Lessons Learning Center at EFR!


GRAND OPENING Lessons Learning Center 159-1511

We are so excited to announce the grand opening
of the PSP Lessons Learning Center!


There are lessons to learn basic & advanced PSP, Animation, Vectors, Pixels, Digital Painting, using plugins, & so much more! No matter whether you are a beginner or expert tagger, there is something for everyone!

Please stop by and check out these awesome lessons!

GRAND OPENING Lessons Learning Center 10114810
We owe a huge thank you and gratitude to WIGH/Angel & Chakoteh/Vikki for their generous offer to allow EFR to post & share these amazing PSP lessons with our membership!

WIGH was the owner of a premiere teaching forum, MarvelousArtworks and for over 15 years offered free lessons to the PSP Community. In addition, both WIGH & Chakoteh are well known artists and designers. To have them share their time, talent & creativity with us is a huge gift!

And a special shout out goes to Craftykid, Patricia & Deana for working tirelessly to move the 1200+ lessons to EFR. It was a huge undertaking, but these amazing ladies did it in record time. Thank you!
GRAND OPENING Lessons Learning Center 1_oxo358

Thursday, April 14, 2022

New Template by Pammers!

Pammers used this fabulous mask in the tutorial Summer Days HERE.
Look below to see the amazing tag she made using the template!
Thanks Pammers for this awesome tut & tag!

Thursday, March 17, 2022

Tutorial by Rita 'Bobbie’s Bear'


Tutorial by Rita Bobbie’s Bear

This adorable tag was made by Rita and can be found at her site, Tutorials by Rita 
CLICK HERE. She used the awesome art of Bobbie Allen, one of EFR's Resident Artists.
 You can get the tube at EFR or Bobbie's site, bobbieandmarilynallen.com.

If you do the tutorial, please let us know, we'd love to show off your results!

Tuesday, March 1, 2022

Tutorial: 'Easter' by Mimi's Madness


This adorable tag was made using the tutorial Happy Easter by Kelli, owner of  the blog 
Mimi's Madness. You can find the tut at https://purplehearts7591.blogspot.com. It uses a 
gradient from the blog and a tube by Marilyn Allen, our resident artist!

If you do the tutorial, please let us know! We love to show off your results here at the blog!

Friday, February 18, 2022

Tutorial: 'In Like A Lion' by Mimi's Madness


This gorgeous tag was the result of a tutorial written by Kel, an amazing tagger & 
tutorial writer from our EFR forum! The tut is called In Like A Lion and can be found at 
her blog, Mimi's Madness. It uses a mask & gradient found here at the blog!

Please let us know if you do the tutorial, we'd love to show off your results!
Thank you, Kel!

Tuesday, February 15, 2022

Bright - PTU Tutorial by Pammers


 Bright - PTU Tutorial by Pammers

This lovely tag was made by Pammers! You can find her tutorial for the tag at her 
blog, Pammers Passions http://pammerspassions.blogspot.com. Thank you Pammers
 for this awesome tutorial!

If you do the tutorial, please let us know, we'd love to show off your tag!

The scrapkit used in this tutorial is by Fresh As Springtime by AWS (Angel Wing Scraps)
and was used by EFR taggers to make the cluster frames in the following post! Enjoy!

Tuesday, December 7, 2021

Tutorial: 'Winter Wonderland' by Mimi's Madness


 Winter Wonderland by Mimi's Madness

This awesome tag was created by Kelli! You can find the tutorial for it at her
blog, Mimi's Madness. Thank you Kelli for this awesome tut!

You can get a mask to use in the tut from right here at the blog, HERE.

Saturday, December 4, 2021

Tutorial: Jolly Winter & Bright Noise by Mimi's Madness


 Jolly Winter by Mimi's Madness

This gorgeous tag was created by Kelli! You can find the tutorial for it at her
blog, Mimi's Madness. Thank you Kelli for this awesome tut!

You can get a mask to use in the tut from right here at the blog, CLICK HERE.

While there, check out the tutorial called Bright Noise! Also by Kelli and
is perfect for the holidays!  CLICK HERE

Tuesday, November 30, 2021

Tutorial: Winter Quiet - EFR Exclusive by Pammers Passions


This gorgeous tag was created by Pammers! You can find the tutorial for it at her blog, Pammers PassionsWinter Quiet - EFR Exclusive. Thank you Pammers for this awesome tut!

The beautiful kit used for the tag was created by Persia Designs & can be found at the EFR forum! 


Both of these lovely kits are available at the Gem Store at https://escapefromreality.forumotion.co.uk/. The Gem Store does NOT trade real money, just 'gems' earned for participation. Everyone starts out with a balance of 25,000 gems so they can play & enjoy!

Saturday, April 17, 2021

Strawberry Passions - PTU Tutorial by Pammers


This lovely tag was made by Pammers! You can find her tutorial for the tag at her blog, Pammers Passions http://pammerspassions.blogspot.com/. Thank you Pammers for this awesome tag!

If you do the tutorial, please let us know, we'd love to show off your tag!

The scrapkit used in this tutorial is by DBS, Designs By Shelly and was used by EFR taggers
 to make the cluster frames in the following post! Enjoy!


Friday, January 22, 2021

Valentine Tutorial 'XOX' by Pammers


This gorgeous tag was made by Pammers, using her new Valentine 
template and the FTU scrapkit by Persia Designs. The tutorial for
 making it can be found at her blog, Pammers Passions!

Friday, April 17, 2020

Dreams - featuring AlessiaC by PSPRachael

This gorgeous tag was made by Rachael, owner of Simply Unique Graphics by PSPRachael, using a cluster frame from EFR by Kathyfrances. For more info on materials used to make the tag and for extra snags by Rachel, please stop by her blog!

Tuesday, January 7, 2020

December 2019 BAK by EFR Members 'Icing On The Cake'

In December our taggers were given the theme 'Birthday Party' and a colorful swatch, then challenged to build a kit! Together they built a huge, gorgeous kit full of colorful elements, 
papers, tubes, cluster frames, etc. Everyone that participated received the full kit! 

And for those that didn't have time to participate, the kit is now available at the EFR Gem Store. For those of you not familiar with the EFR forum & gems, all members start out with a gem account of 25,000 gems. Gems are pretend currency and earned by participation (checking in, voting, etc.). So if you would like this kit, stop by Escape From Reality forum!


Here is a gorgeous tag made by one of our members, Pammers!
You can find the tut written by Pammers for this beautiful tag at
her blog, Pammers Passions.

Sunday, April 28, 2019

Tutorial by Pammers 'Summer' - FTU

This beautiful tag was made by Pammers using a mask & template from here. 
She wrote a tutorial for it and you can find it at her blog, Pammers Passions
Her tut is easy to follow and gives clear directions, and is perfect for this time of year! 
If you do the tutorial, please let us know. We'd love to add your tag to this post!

Happy tagging!

Saturday, December 8, 2018

FTU Winter Masks 36-39 by Kathyfrances

 These FTU masks were made by me, Kathyfrances.
Hope they are something you can use!
Hugs, Kathyfrances

To save, click on mask to open to full size, 
then right click to save as usual.

mask 36

mask 37

mask 38

mask 39

Here is a beautiful tut 'Golden' written by Pammers of
Pammers Passions , using mask #38:

Friday, January 2, 2015

FTU Cluster Frames 'Winter Warmth'

FTU Cluster by Kathyfrances
Scrap Kit 'Winter Warmth' byTiny Turtle Designs
http://tinyturtledesigns.com
  To save, click to see full size, 'right click' and 'save image as'


And look what Sly made using one of the frames!

We'd like to send a special shout out to Delire de Scrap Tutorials for using one of the clusters in her amazing tut, 'Winter Grey'. You can find her tut CLICK HERE.

Friday, April 25, 2014

Soft Elegance Tutorial


This tutorial was written by me on April 25, 2014, using PSP X but any version will work. This tut is written assuming you have a  working knowledge of  PSP.   Any similarity to any other tutorial is purely coincidental.

Supplies:
Graphics of Fantasy Cluster Frame 'Soft Elegance' made by me click here
Tube of choice - I am using the gorgeous art of Very Many available at verymanytubes.com 
DVB Masks 133 available at Designs by Vabs 
Zephyr Script font click here 

Filters Needed:
Eye Candy filter Perspective Shadow - free download here.
Filters Unlimited 2.0 - free trial download here.
(although I used these filters, the tag can be made without them by using drop shadow and eliminating the steps involving Filters Unlimited) 

Don't forget to save often!

To begin, open a blank canvas  600 x 600.
Floodfill with a color complimentary with your tube. I used #dbded6.
Apply mask and merge group.
Apply Filters Unlimited -> Paper Textures-> Japanese Paper
with these settings:  

Open and copy the cluster frame. Paste as a new layer and resize 95%:
(do not select 'Resize all layers')
 Use the Eraser Tool to erase the copyright from the frame layer.
Add a Perspective Shadow using Eye Candy with these settings:
 *If you do not have Eye Candy, use a drop shadow of your choice.

Open the tube you are using and copy. Paste as a new layer and resize to fit the canvas. I resized the Very Many 'Spring' tube by 52%. Add the same perspective shadow as you used before.

From the original tube, use your Selection Tool in selection mode to select a portion of the tube to use in the tag behind the frame. Here is a sample of how I did mine:
Copy and paste as a new layer under the frame layer and rename the layer 'selection 1'. Resize and position so that it is behind the opening in the frame. Use the Eraser Tool to remove any portion that may show outside of the frame. See my finished tag at the top of the tut as a reference. Duplicate the layer and rename this layer 'selection 2'.

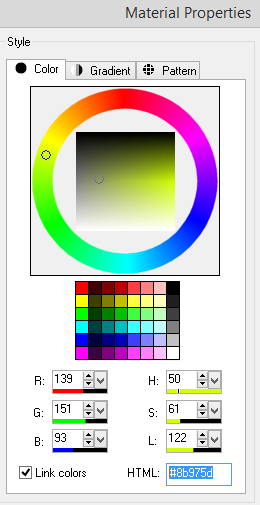
Recolor the original layer (selection 1) using the Color Replacer Tool and this color #8b975d.
Add a drop shadow of V:2, H:2, Opacity 55.
 
Now go back to the duplicate layer (selection 2) and set the Blend Mode to Screen (see below):
Add the Filters Unlimited - Japanese Paper effect to this layer using the same settings as before.

Go back to the top layer. This should be your tube layer. Select Merge-> Merge Visible.
Add the tube copyright. Add text of your choice using Zephyr Script font. Merge and save as a PNG.

Thank you for trying this tutorial!

Monday, April 21, 2014

Tutorial - Kindness in Blue


Kindness in Blue

This tutorial was written by me on April 21, 2014, using PSP X but any version will work. This tut is written assuming you have a  working knowledge of  PSP.   Any similarity to any other tutorial is purely coincidental.
   
Supplies needed:
"Kindness In Blue" Scrap kit by Ladyhawwk Designs Scrapkits available CLICK HERE.
Tube of choice - I used the beautiful work of Suzanne Woolcott.
gemsmask 223 available at Gems Taggin' Scraps 
Eye Candy filter Perspective Shadow - free download HERE.
Font of choice - I used Euphorigenic Font available HERE
 *Remember to save often and add a Drop Shadow as you go.

To begin, open a blank canvas 600 x 600. Selections – select all.
Open the paper of your choice and copy. I used paper 1. Paste onto your blank canvas by pasting into selection. Deselect.
Apply the mask I suggested or one of your choice.  Merge group. Duplicate once & merge down. Resize 80%, but do not check the box "resize all layers".

Next, open Frame 1. Copy & paste as a new layer.
Add a drop shadow using Eye Candy Perspective Shadow - I used these settings: 
(If you do not have Eye Candy, you can add a regular drop shadow using the settings of your choice.)

Next, open your tube. Copy and paste as a new layer, resizing as needed. Apply the same perspective shadow as before.

You will need to open these elements and word art:
Word Art 1
element 3/butterfly & resize 20%
flower elements 37, 38, & 39 resize 30%
Copy and paste, arranging as you like or as I did in the tag above.
Apply a drop shadow using these settings:

Open element 47 & resize 35%. copy and paste as a new layer. Move it down so it is under the frame layer & above the mask layer. Position it to peek our from the lower right hand corner of the frame. Duplicate and go to Image - Mirror. Move it so it peeks out from behind the upper left hand corner of the frame. Merge down and add the drop shadow (same as above).

Now we are ready to Merge Visible. I added a few white twinkles to mine. If you do not have any, here is a copy of the one I used. I resized it by 50% and copy/pasted as a new selection. No drop shadow on twinkles!
Add copyright. Using the crop tool, trim off the extra bit of canvas but make sure you leave space to add your text. Save as a PNG file.

Thank you for trying this tutorial!